

Every pie begins with one simple thing: the crust. It doesn’t matter how dreamy the filling is—whether it’s tangy lemon meringue or rich chocolate silk—if the base isn’t right, the whole dessert feels off. That’s why bakers spend so much time perfecting the art of baking a pie crust blind. It’s one of those steps that sounds intimidating, but once you understand it, you’ll never go back to soggy bottoms or undercooked shells.
So, what does blind baking even mean? Why do recipes call for it? And how can you do it at home without ending up with a mess of shrunken pastry? Let’s break it all down in a way that’s approachable, practical, and honestly—fun.
Let’s clear up the big question first: what is blind baking? Simply put, it’s the process of pre-baking a pie crust before adding the filling. Sounds simple enough, right? But the reason behind it is important.
Think about pies with custards, creams, or no-bake fillings. These don’t need much oven time—or sometimes none at all. Without blind baking, the crust would stay pale, raw, and unpleasantly doughy underneath all that goodness. By baking the crust first, you’re giving it structure, crispness, and flavor that can stand up to whatever filling you’re using.
But here’s where people stumble. Without weights or precautions, crusts puff up, shrink down the sides, or crack. That’s why understanding what is blind baking a pie crust in practice—beyond the definition—matters so much. It’s not just tossing a crust in the oven; it’s creating the perfect foundation.
You might be wondering, “Do I really need to?” The short answer: yes, if your filling won’t be baked long enough to cook the crust.
Take cream pies, for example. Banana cream or coconut cream relies on a stovetop custard poured into a baked shell. If you skip blind baking, you’ll end up with a gummy mess. Or think about quiches. They bake long, but the moisture from eggs and cream can soak right into raw dough. Pre-baking helps guard against that dreaded soggy bottom.
So, while it feels like an extra step, blind baking is more of a guarantee—a promise to yourself that your pie will come out balanced and professional-looking.
Before we dive into the how-to, let’s talk gear. You don’t need a pro’s kitchen, but a few basics make the process smoother:
Pie weights (ceramic, metal, or even just dried beans)
Parchment paper or aluminum foil
A fork for docking (more on that in a bit)
Your favorite pie pan, preferably metal or glass for even browning
That’s it. Nothing fancy. You can improvise weights with rice or lentils if needed. The idea is simply to keep the crust flat and even during the bake.
Here’s a clear, no-fuss way to master baking a pie crust blind at home.
Warm dough is the enemy. Roll it out, fit it into the pan, and then chill it—at least 30 minutes in the fridge. This helps prevent shrinking when the heat hits.
Using a fork, poke small holes across the bottom. This lets steam escape and reduces puffing. Don’t worry, the holes won’t ruin the crust—they’ll disappear once baked.
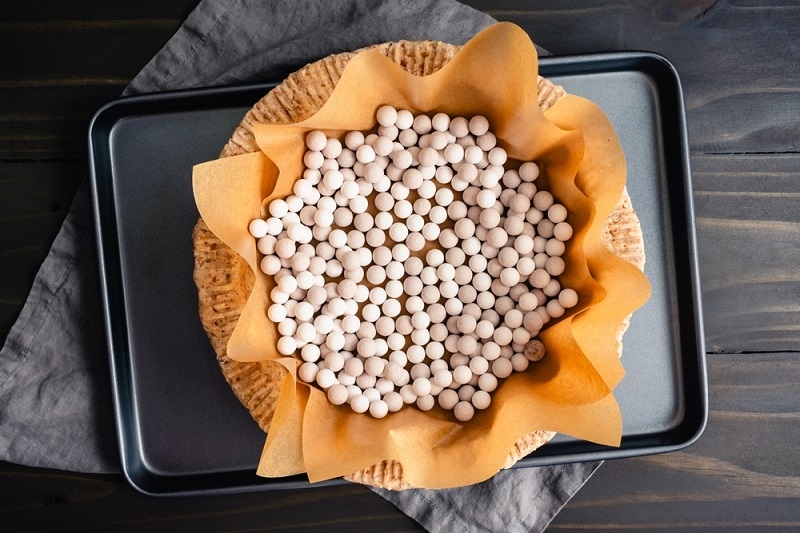
Place parchment (or foil) over the dough, making sure it covers the edges too. This acts as a barrier between the dough and your pie weights.
Fill the shell with weights, beans, or rice. Spread them evenly so the crust bakes flat. This is key to preventing bubbles or sagging sides.
First, bake with weights for about 15 minutes at 375°F. Then remove the weights and parchment, and bake again for another 10–15 minutes. The second round gives you that golden, crisp finish.
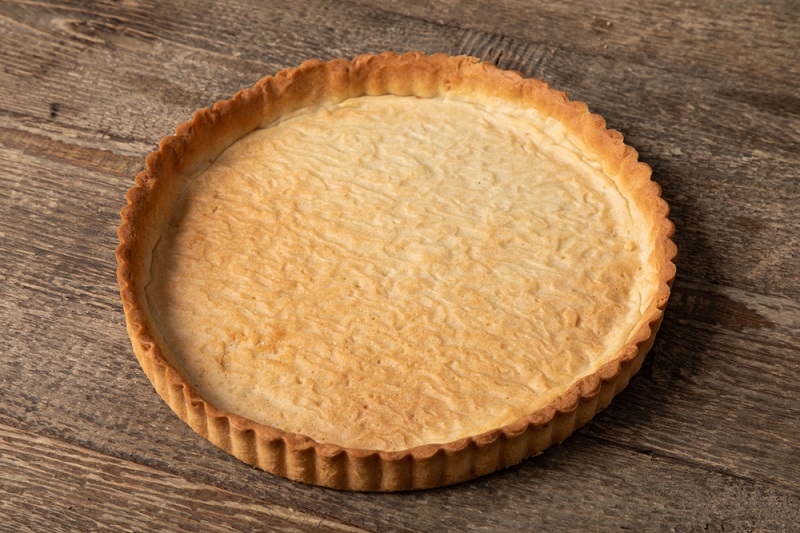
That’s it. When you lift your crust out, you’ll have a sturdy, golden base that’s ready for anything—custard, cream, fruit, you name it.
Even seasoned bakers make slip-ups. Here are the biggies to watch for:
Skipping chilling time: Dough shrinks fast if it’s too warm.
Using too few weights: This leads to ballooning in the center.
Over-baking in the second stage: Keep an eye out; it can go from golden to burnt quickly.
Docking without weights: Docking alone helps, but it won’t stop puffing completely.
Learning these small tricks means you’re less likely to toss a ruined crust into the bin.
On a Similar Note: 10 Crispy Fried Tofu Recipes Even Meat Lovers Will Devour
Not all pies need the same approach. Sometimes you only need a partial blind bake, sometimes a full one.
Partial bake: Great for quiches or pies that will go back in the oven with filling. You just want to set the crust before the wet filling is added.
Full bake: Essential for pies with cooked or chilled fillings, like key lime or chocolate cream. Here, the crust must be fully done before filling.
Knowing when to choose which will change the outcome. Recipes usually guide you, but once you practice, you’ll start to recognize which approach fits.
Here’s where it gets fun. Blind baking doesn’t have to be plain. You can brush the crust with egg wash after removing the weights to give it shine and extra seal against moisture. Or sprinkle sugar on the edges for a sweet crunch.
Want to level up even more? After blind baking, coat the base with a thin layer of melted chocolate. This keeps cream fillings from soaking in and adds a surprise flavor kick.
Let’s face it: sometimes things go wrong. But instead of panicking, here’s how to fix common issues with your baking blind pie shell adventures:
Edges Shrink Too Much: Next time, let the dough rest after rolling so the gluten relaxes. Or press the dough slightly above the pie pan edge before chilling.
Crust Is Pale: Move the pan to the lower oven rack for the final bake. This gets more direct heat on the bottom.
Bottom Stays Soft: Brush with egg white before baking the second round. It creates a barrier that locks in crispness.
Mistakes happen, but every one of them teaches you something new.
Blind baking isn’t one-size-fits-all. The type of crust matters too. A buttery shortcrust pairs beautifully with custard pies, while a sturdier all-butter crust stands up to rich chocolate. Graham cracker crusts? They’re technically blind baked too, just quicker and crunchier.
When you think of it that way, blind baking is more versatile than people realize. It’s not just pastry—it’s technique.
There’s something deeply satisfying about pulling a perfectly baked shell out of the oven. It’s golden, it smells nutty, and you know you nailed the foundation of your pie. That confidence translates to the rest of the recipe—you’ll feel freer to play with fillings, decorations, and flavors because your base is solid.
That’s why what is blind baking isn’t just a technical definition. It’s a mindset shift. Once you’ve got the crust sorted, the rest of the pie feels like play.
Read More: Basil Pesto Recipe: Easy, Fresh, Flavorful & Homemade
Blind baking might seem like a chore, but it’s really a baker’s secret weapon. From understanding what is blind baking a pie crust to practicing small tweaks like docking and chilling, it’s the details that make the difference.
So the next time you’re prepping a pie, don’t skip this step. Treat the crust like the star it is. Because when that first slice is lifted out and the crust holds beautifully—flaky, golden, and crisp—you’ll know it was worth the effort.
And honestly? Nothing tastes better than success baked right into your dessert.
This content was created by AI